Pages

Saturday, February 5, 2022

Curl command throws error on Windows10

 Problem Statement: 

Windows 10 now comes equipped with cURL and we can use CURL as we use it in Linux. But many times curl commands with POST dont run as expected and throw some errors like 

Example: 

C:\WINDOWS\system32>curl --request POST 'https://<Your URL>'  --header 'Content-Type: application/x-www-form-urlencoded' --data-urlencode 'refresh_token=<Your Token>'

This command will throw following errors when you will run it on your CMD shell: 

curl: (3) URL using bad/illegal format or missing URL

curl: (6) Could not resolve host: application


Cause: 

I found these errors only present in CURL on Windows 10 (build 17063 or later), the Windows curl.exe native program  understands the single quotes and double quotes in different way. 


Solution: 

Change the single quotes (') in your curl command syntax with double quotes (") and it will run successfully. 


Cheers!!


Friday, September 27, 2019

How to create Custom VPC with Public Subnet to spin up EC2 instances accessible from Internet

Problem Statement: 

Creating a Custom VPC in an AWS region with a Public Subnet and to Spin up EC2 instances which are accessible from internet. 

Solution: 

In this exercise, I will show you how can we create a Custom VPC in our AWS account with a Public Subnet which will host EC2 instances which can be accessed from internet. 

Steps: 

1. Log on to AWS Console with your root account and select VPC.

2. Click on Create VPC and enter the details of your new VPC like Name and CIDR Block.

3. Make sure your CIDR block has a unique private IP range. I am selecting 10.0.0.0/16.

4. Click on Create and done.


5. Now create and attach an Internet Gateway to this VPC since this VPC will require internet gateway to connect with internet.

6. Click on Internet Gateway from the left pane of VPC page and Create Internet Gateway. Give a name to the new Internet Gateway and click create.


7. Attach this Internet Gateway to your new VPC.

8. Go to Internet Gateway page again, select the newly created IGW and select "Attache To VPC". In the next window select the new VPC to be attached and click attach.  Your VPC is now attached with the Internet Gateway. Please note that one VPC can have only one Internet Gateway attached to it.
Once the IGW is attached to VPC it should look like following: 


9. Now create a Public subnet under this VPC in Ohio which will host our EC2 instance.

10. For creating a Public Subnet in new VPC, Select Subnets from left Pane and click on Create Subnet Button. Enter following details in the next window to create Public Subnet:

Name Tag:  Name of the Subnet
VPC:            Name of VPC where you want to create this subnet (in our case our new VPC).  Select it from Drop Down.
Availability Zone: Select Availability Zone of your choice from the Drop Down
IPv4 CIDR Block: Give the CIDR block of IPs which will be used by this Subnet
(I have chosen 10.0.1.0/24). Make sure that Subnets IP CIDR block must be smaller than VPC's CIDR block.

11. Now click on Create Button.


12. The public subnet in your custom VPC has been created but it is not yet able to assign public IPs to its EC2 instances nor it is able to communicate to internet. For this we will have enable it to auto assign Public IP address to its EC2 instance and also need to associate it with a Route Table which allows it connect to Internet.


13. Now select that Public Subnet and Click On Action and select "Modify Auto-Assign IP Settings".. In the next window Check the box saying : Auto Assign IPv4 and click Save.


14. Now EC2 instance created in this Subnet with automatically a public IP assigned to them. Without having EC2's public IP, we cant connect from our desktop via internet.

15. Now create a Route Table which will allow traffic to/from this subnet to internet via Internet Gateway and associate that Route Table with our newly created public Subnet. Remember that one subnet can have only one Route Table associated with it at a time.

Create Route Table - Go to VPC section again, Select Route Tables from left pane and Click on "Create Route Table" button.

16.  Give a Name to the Route Table and Select VPC from the drop down menu. We will select our VPC which we had created recently.


17. This route table will have default route to its VPC but will not have route to the internet. '

18. To add a route to the internet to this route table Select the newly created Route Table and click on Routes button underneath. Click on Edit Routes.


19. In the Edit Routes window , 2 routes will already be their by default, dont change them, but add to more routes 0.0.0.0/0 and ::/0 in Destination and Select the Internet Gateway (which is associated with this VPC) from drop down menu as Target for both the new routes and click on Save Routes button.


20. This Route Table is now allowing routes to / from internet via Internet Gateway.

21. Now associate this Route Table with our Public Subnet. Click on "Subnet Associations" button on Route Tables page and then click on "Edit Subnet Associations"


22. In the next Window, Select the Subnets you want to associate with this new Route Table. In our case , We will only select the Subnet which we recently created (Public Subnet). and then click Save.


23. This is all you need to do to create a Custom VPC with a Public Subnet. Any EC2 instance which will be spun up in this Public Subnet under this Custom VPC will be accessible from internet (Provided you have associated a right security group (SSH 22 from 0.0.0.0 for Linux and RDP 3389 from 0.0.0.0 for Windows machines) and have the right key.

24. I have create an EC2 instance in this VPC and it is accessible from internet.


25. This instance is accessible from Internet. This has been spun up in my Custom VPC with a Public Subnet in Ohio Region.


This is how we can create our own Custom VPCs and Public Subnets in our personal AWS accounts.


Cheers!!!!

Thursday, August 1, 2019

Accessing Public S3 Bucket from EC2 instance in a Private Subnet without NAT Gateway or IGW

Scenario : In a production AWS Cloud environment, we generally have our EC2 instances hosted in a private subnet which are not able to access internet or any public resource nor these EC2 instances are accessible through their public IP / DNS name. They are only accessible through a jump server placed in Public Subnet of that VPC and right Route Table configuration.  

Problem : Since S3 buckets are extensively used to push data like logs / archives from EC2 instances hosted in Private Subnet, they generally need NAT gatewate / IGW to be attached with that private subnet so that those S3 buckets could be accessed. But NAT gateway takes the traffic to internet and then connects to S3 which is a chargeable service. So how can we access S3 public buckets of the same regions from EC2 instances hosted in Private Subnet of an AWS VPC?

Solution: The solution to this problem is using VPC Endpoints. VPC Endpoints is a service provided by AWS which allows traffic from your private subnet to other AWS services like S3 without using any NAT Gateway, Elastic IP or IGW.

Assumptions: I am assuming that following things are already in place in your environment :

1. A public subnet having access to internet. (Assuming IP range as 10.0.0.0/24)
2. A Private Subnet within the same VPC. (Assuming IP range as 10.0.1.0/24)
3. A windows EC2 instance in Public Subnet having a public IP assigned to it so that you could access it from your desktop / laptop.
4. An EC2 instance (Take linux for better testing) in Private Subnet without any internet access by default.
5. Private subnet and public Subnet can access each other using their private IPs. 
6. You are able to access EC2 server of your private subnet through the jump server hosted in public subnet.
7. You have a S3 bucket which you can access with your configured access policies.
8. You have atleast one user with access key - pair which has full access on that S3 bucket.

Steps. 

We will now first test if the S3 bucket is accessible from the EC2 instance of private subnet.

1. Login to your Jump Server (Windows host) and connect to your EC2 instance (of Private Subnet) using its private IP. (in my case 10.0.1.70).


2. Once you login to the EC2 instance, configure AWS CLI so that you could connect to your AWS subscription from your private EC2 instance. Put following command on EC2 putty terminal:

$ aws configure

Enter the Access Key and Secret key of the user which has access to the S3 buckets you want to access. 


3. Now check if you are able to list the S3 bucket from this EC2 instance which your user already has access to. Put following command on EC2 putty window..

$ aws s3 ls


The window will not show anything because your user is not able to reach to S3 bucket from your EC2 instance which is hosted in Private Subnet and that subnet does not have any NAT Gateway or IGW associated with it.

Creating a VPC Endpoint 


4. To enable the EC2 instance of Priave Subnet to access S3 buckets without internet access, we will use VPC Endpoint.

5. Go to VPC Service on your AWS Console and select EndPoints from Left hand menu. and click on Create Endpoint


6. In the proceeding window. Select the AWS Service as " com.amazonaws.us-east-1.s3"  and VPC "your own VPC where your Private and Public Subnets are" . Also select the Route Table to which this Endpoint will be associated. The same route table must be associated with your private subnet. 


7. Now click on "Create Endpoint".

A message will be displayed saying "VPC Gateway Endpoint created successfully.

8. you can also see then newly created Endpoint when you click on Endpoints in left hand menu.

9. Cross check that your private subnet now has route entry which associates it with this Endpoint.

10..You have now created the VPC Endpoint, its time to test if your EC2 instance can now connect to S3 buckets or not?

11. Go to EC2 instance's putty terminal again and run the following command one more time: 

$ aws s3 ls 

This time , it should list the S3 buckets to which your user has access to.


12. This confirms that your EC2 instance which is hosted in public subnet which does not have any internet connection or is not associated with any NAT Gateway or IGW can now access the S3 buckets within that same region. 

13. you can perform all S3 operations on these buckets if your user has privileges to do so...

14. Lets copy a file name "S3toEC2usingVPCEndPoint.txt" from EC2 instance to S3 Bucket "lalit-privatesubnet-test-s3". Trigger following command :

$  aws s3 cp S3toEC2usingVPCEndPoint.txt s3://lalit-privatesubnet-test-s3

This command will upload a file named "S3toEC2usingVPCEndPoint.txt" from EC2 instance to S3 Bucket "lalit-privatesubnet-test-s3".


This is how we can configure VPC Endpoints in AWS to allow our EC2 instances hosted in private subnet to connect to S3 buckets without having any NAT Gateway or IGW or Internet Access.

Enjoy!!!!!


Wednesday, July 17, 2019

How to Join AWS EC2 Linux instance to an AWS hosted Domain Controller

Problem:  We need to add an AWS EC2 Linux instance to a domain "lalit.org" which is running in the same VPC and want to authenticate it using domain credentials instead of key pair.

Solution: Before we move ahead with the solution here are few assumptions:

Assumptions: 


1. An AD Domain Controller is already in place and is working. (In our case lalit.org).
2. A Linux EC2 instance has already been created but it is accessible through Key Pair only.
3. DHCP Option Set is already in place at VPC level to point to the Domain Controller Machine for DNS / DHCP services.
4. The Linux EC2 instance is in the same VPC where the DC is running. (We can add Clients from other VPC also but for that we need VPC peering in place).

Steps: 

Please follow these steps to add a Linux EC2 instance to domain running on another EC2 instance in AWS VPC.

Step 1: Log on to Linux EC2 instace (Which you want to join to the domain) with default ec2-user and Key Pair through putty or any other terminal window software.

Step2: Update the EC2 instance by running following command:

 sudo yum update -y

Step 3: Install packages required for joining the Linux instance to a windows AD domain by running following command:

sudo yum -y install sssd realmd krb5-workstation samba-common-tools

Step 4: Once all these tools installed on Linux instance, run following command to join this server to domain (I am taking lalit.org as the domain name here)

sudo realm join -U admin@lalit.org lalit.org --verbose

If all goes fine.. it will display a message saying :  * Successfully enrolled machine in realm

Step 5: Now configure the sshd_config file at location /etc/ssh/sshd_config to configure the machine to allow password authentication

sudo vi /etc/ssh/sshd_config 

Set the passwordauthentication value to yes


Step 6: Restart the sshd service with following command: 

sudo systemctl restart sshd.service


Step 7: Now update the sudoers file to allow domain users of lalit.org domain to login to the EC2 instance under group %AWS

Add following lines at the bottom of sudoers (visudo)

## Add the "AWS Delegated Administrators" group from the lalit.org domain.
%AWS\ Delegated\ Administrators@lalit.org ALL=(ALL:ALL) ALL   


Step 8: We now need to add atleast one user from domain who has root/sudo access to the machine.. 

add admin@lalit.org user under root in sudoer file (visudo)


Step 9: Now to insure that all the changes have been successfully made, restart the sshd service once again and log off from the terminal (putty session).

Step 10. We now need to test that if we can login to this EC2 Linux machine using our domain credentials or not..

Step 11: Put the public IP of this EC2 Linux instance in putty and click connect ( No need to select key file this time)

If we have configured all the steps correctly, you must get the login as: prompt at putty terminal.

Step 12: put the domain user name (username@domain) .. in my case admin@lalit.org. Enter domain password for the user. You should now be able to login to the EC2 Linux machine using domain credentials. This confirms that your EC2 linux machine has been added to domain successfully and can be authenticated via Active Directory Domain. 
You should also be able to do sudo with the same user since it has been added in sudoers file...


Enjoy !!!!!

Tuesday, May 21, 2019

Enabling Graphical User Interface (GUI Mode) on CentOS - Linux

Problem: How to enable Graphical User Interface (GUI Mode) on Pre-Installed Linux machine with core.


Solution : 

Prerequisite :

1. You must have sudo access access to your Linux machine.
2. Your Linux machines must have access to either internet or latest Yum Repositories. 

Steps: 

To enable GUI on your Linux (CentOS), you need following commands to be run in a sequence:

1. Install GNOME Desktop through following command:

# sudo yum group install "GNOME Desktop"

It will install all the required binaries on your Linux machine.

2. To confirm that GNOME Desktop (GUI) has been successfully installed on your machine, run following command:

# startx

Accept the license agreement and then set few local language settings. 
Click done.

It confirms that GUI has successfully been installed on your machine but it is temporary. As soon as you will reboot your machine, you will again reach to your black terminal. 

3. To make GUI as your default mode run following command.

# systemctl set-default graphical.target

The output of this command will be similar to following:

Removed symlink /etc/systemd/system/default.target.
Created symlink from /etc/systemd/system/default.target to /usr/lib/systemd/system/graphical.target.

It will permanently  change your run level from runlevel3 (Core with Networking) to runlevel5 (Graphical). Now you will get the GUI based login screen when even you will reboot / log on to your Linux (CentOS) machine.


Enjoy!!!!


Monday, May 13, 2019

Attaching a New Volume to an EC2 Linux instance

Problem: Step by Step process to attach a new volume (new disk) to running EC2 instance


Solution:

Pre-Requisite:

1. You must have an AWS subscription.
2. An EC2 with Linux (Amazon AMI or RedHat AMI) must be in running state.

Steps:

Adding New Volume from AWS Console.


  • Go to Volumes from your EC2 Dashboard and click on "Create Volume"
  • Select the Volume Type as (General Purpose SSD - GP2) , Size as 10 GB, Availability Zone, and leave rest of options as default.
  • Click on Create Volume.


 2. You will get a confirmation that your volume has been created successfully and it will show the volume Id in the next screen.


   3. Now click on Close , it will take you to the Volumes console where you will find an additional disk with "Available" status.


4. You have successfully created a new Volume of 10 GB size, now its time attaching this disk to your EC2 instance. To attache this new volume as a disk to your EC2 instance, select that new volume and click on "Action" and select "Attache Volume" option.

5. It will take you to the next screen where you will put the instance ID from the drop down menu and the Partition name of the disk will be automatically selected (as /dev/sdf) .. it is default path selected for the new volume by AWS.


6. Click on Attach button, and AWS will confirm that you have successfully attached the new volume to an instance. In the next window you will see that both volumes' status is now "in-use".


Commands for Mounting the New Volume in the EC2 Instance:


7. Since this EC2 instance is a linux instance , we will have to mount it as new partition / disk from the linux OS.

8. Log on to your EC2 instance, to which this new volume has been attached from AWS console.


9. type sudo su to take root access of the OS.

10. Now put the following command to list the available disks on your Linux EC2 instance.

    lsblk

It will list all disks available to the OS. In our example we can see that the last disk with them xvdf is visible (with 10G capacity).


We have to mount this disk to OS to use as data1 disk.

11.  Now check if this new disk contains any data or not. Run the following command to know this:

   #file -s /dev/xvdf

if the output of this command is /dev/xvdf:data then it means that this disk is empty.


12. Now format this disk / volume to use the file system ext4 with following command.

# mkfs -t ext4 /dev/xvdf

if you have shoot the command properly and there is no other error, it should give following results.


13.  Create a directory of your choice to mount our new ext4 volume. I am using the name “data1

 mkdir /data1

14. Now mount the new volume to "data1" directory through following mount command

# mount /dev/xvdf  /data1/


15. Now your new volume has been successfully mounted and is ready to use. you can confirm its usability using df -H command. It should produce following results:


This output confirms that your disk / volume has been successfully attached and mounted to your Linux OS for use.

Make the EBS Volume Mount permanent on Linux.


The Volume which we just mounted in previous steps is temporary. As soon as your OS will restart, this mount point will be lost and you will no longer be able to use this disk using /data1 path. To make it permanently available for use even after reboot, you will need to make changes in /etc/fstab file.

16. Take the back of fstab file using following command before making any changes.

# cp /etc/fstab /etc/fstab.old


17. Now make the following entry in /etc/fstab file using #vi /etc/fstab command

      /dev/xvdf      /data1        ext4       defaults,nofail

Save the fstab file using :wq! and exit the vi editor.


18. Now run the following command to check if the fstab file has any errors after you made this entry.

# mount -a

If your fstab file does not have any error the command will run seem less and you are done with 

19. Now reboot your EC2 instance, and it will mount the new volume automatically. you can check that with df -f command.


Hope This Helps !!!!

Thursday, April 25, 2019

Deploying Self Signed SSL certificate on AWS Application Load Balancer

Problem: When we create ALB (Application Load Balancer) under AWS ELB, we sometimes have to configure SSL on that load balancer to allow only HTTPs requests through it.


Assumption: 

I am assuming that audience of this blog post already know how to Spin up EC2 instances and how to create ELB - ALB in AWS.


Pre-Requisites: 

1. Two identical EC2 instances with Apache, OpenSSL and AWS CLI installed on them.
2. An IAM user having Power User access to the AWS subscription which will be used to upload certificates to IAM store.
3. An ALB (Application Load Balancer) in AWS with above 2 EC2 instances added in target group of this ALB and with only HTTP listener port. We will add HTTPS listener in later steps.


Solution: 

To solve the above problem we will take following steps.

1. Create 2 identical EC2 instances in 2 different Availability Zones with in the same region and allow them to be placed in public subnet of that VPC.
2. Log on to these instances using putty. In case of Windows instances connect them using RDP.
3. Since I am using Linux instances.. I will do putty to them. I have used Amazon Linux AMI to create instances since this AMI comes with AWS CLI & OpenSSL pre installed.
4. Get sudo access to the EC2 instance and then Install latest updates on these EC2 instances using following command.

  • Sudo Su
  • yum update -y
  • shutdown -r
5. Once the server resumes from restart, install Apache http server using following command: 
  • yum install httpd -y
This command will install Apache HTTP server on EC2 instance.

6. Now confirm if the Apache Service is active on the server or not, using following command.
  • systemctl httpd status
7. Now create an index.html file under /var/www/html directory in order to differentiate both the EC2 instances from each other. Run following command to create and update the index.html file 

  • cat > /var/www/html/index.html
        Put some code in the file like "I am Webserver1"
        Press Ctrl+C to save and close the file.


8. Run ls command to confirm that index.html file is present under /var/www/html folder.

9. Repeat steps 4 through 8 on second EC2 instance. Make sure you change the html code in index.html file on other EC2 instance like " I am Webserver2".

10. Now since we  have created 2 apache web servers on EC2 instances. Let us now create Self Signed Certificate which will be used on ALB later on.

11. To create Self Signed Certificate on your EC2 instance, you must have OpenSSL installed on it. the Amazon Linux AMI has OpenSSL preinstalled but if you are using any other Image or template then you can install it using following command.
  • yum install openssl -y
12. Once OpenSSL gets installed on the EC2, it automatically sets the environment variable so you can directly run the OpenSSL command.

13. To install the Self Signed SSL certificate you must have 2 files in PEM format (privatekey.pem and certificate.pem). We will create both of these files now using OpenSSL

14. On you EC2 instance one. run following commands to create the Private key and then the Certificate using that private key.

  •  openssl genrsa 2048 > my-private-key.pem
It will give you following output


15. Now create the certificate.pem file (Actual certificate) through following OpenSSL command.

  •  openssl req -new -x509 -nodes -sha256 -days 365 -key my-private-key.pem -outform PEM -out my-certificate.pem
Enter the details like Country name, Location, State, etc.
Make sure that you put the common name as : *.amazonaws.com because we will be using the SSL on ALB endpoint which ends with amazonaws.com

you will get following output.


16. Since we  have now successfully creates the SSL private key and SSL certificate on one server.. It is time to upload this certificate to your IAM store from where the ELB fetch it for allowing HTTPs traffic.

17. For uploading these 2 certificate files from your EC2 instance to your AWS IAM certificate store we will use AWS CLI. I am assuming that you have AWS CLI pre installed on your EC2 instance.

18. Run following command to configure your AWS CLI to connect to your AWS subscription.

  • AWS Configure
  • Enter the Access Key ID of the user you have created in IAM
  • Enter the AWS Secret Access Key for the same user.
  • Enter the default region name as "Region name where your ELB is running"
  • just press enter once and your AWS CLI is now configured on your EC2.
18. Upload both SSL files to your IAM store using following command
  •  aws iam upload-server-certificate --server-certificate-name MyCertificate --certificate-body file://my-certificate.pem --private-key file://my-private-key.pem
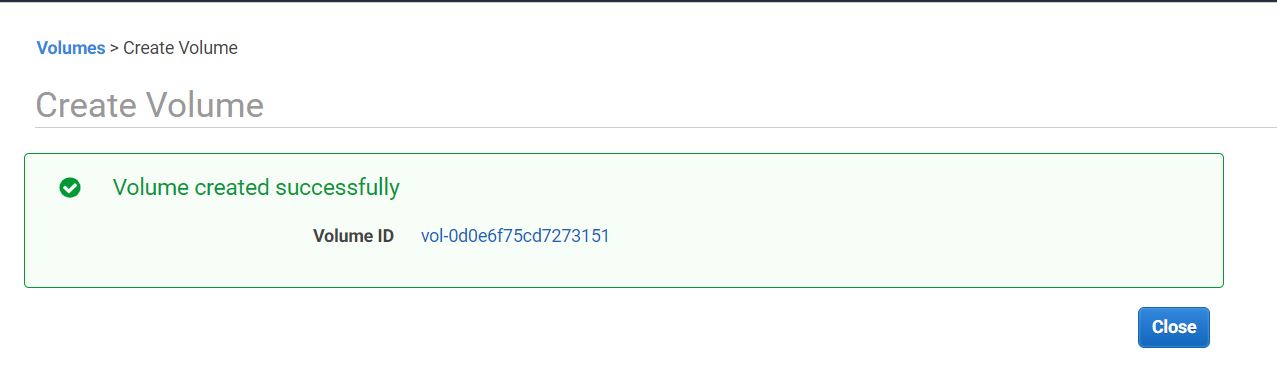
You will see following output in JSON format confirming that your SSL certificate files have been successfully uploaded to IAM store.


19. We are now good to configure our ALB (Application Load Balancer) to allow HTTPS traffic and use our Self Signed Certificate which we have recently uploaded too IAM.

20. Go to EC2 dashboard and click on Load Balancer from Left hand menu.
21. Select "Create Load Balancer"
22. Select "Application Load Balancer (ALB).
23. In the next window Give name to your Application Load Balancer and Select HTTP & HTTPS as listeners (This is very crucial). If you will select only HTTP , it wouldn't use the SSL certificate you uploaded. You will have to choose HTTPS also as the listener .


24. In Next Section, Select atleast 2 Availability Zones . Make sure you select those Availability Zones where are your EC2 instances are hosted.


25. In the Security Settings Page Select "Chose A Certificate From IAM" option and then Select "MyCertificate" from drop down. In the Security Policy section select the latest one to be compliant with latest security policies.


26. For Security Group Settings, Select the Security Group which allows HTTP & HTTPs traffic to this ELB from internet because this ELB is public facint. I have selected the same which my EC2 instances are using.


27. In the Next page "Configure Routing" , create a new Target Group and and add both of your EC2 instances as Targets. Here Target means the EC2 instances where the ELB will forward the request. Keep all the settings as default and click "Register Target" in the next window.

28. Click Review and then Launc.

29. It might take 2 to 3 minutes to create the ALB for the first time. Once your ELB is successfully created it will show you as "Active" when you will click on it.

30. It will show you a DNS name which is the end point of this ALB. We will use this endpoing in our browser to access the ALB.


31. Browse this DNS name (ELB End Point) in your browser. Based on the load balancing algorithm it will pass your request to one of the EC2 instances hosted behind this ELB.

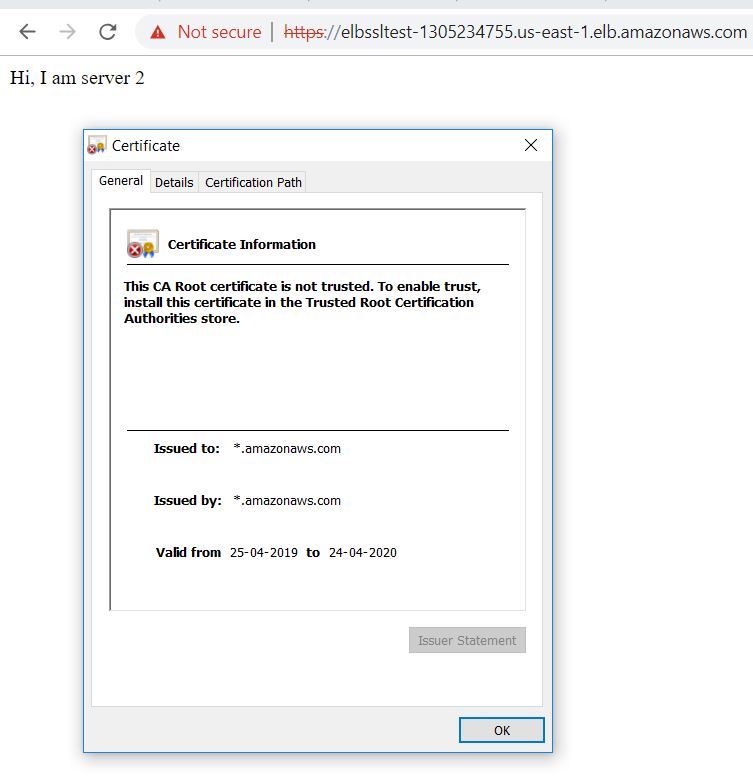
32. Let us try to access this ELB url with https:// , if our configurations are correct, it will show an error saying that "your SSL certificate is not trusted". This is the expected behavior because our SSL certificate is a self-signed certificate. It has not been issued by any Trusted Root CA.


34. This is how we can create the ALB (Application Load Balancer) in AWS which will allow HTTPS traffic using SSL certificate.


Enjoy!!!!