Pages

Monday, May 13, 2019

Attaching a New Volume to an EC2 Linux instance

Problem: Step by Step process to attach a new volume (new disk) to running EC2 instance


Solution:

Pre-Requisite:

1. You must have an AWS subscription.
2. An EC2 with Linux (Amazon AMI or RedHat AMI) must be in running state.

Steps:

Adding New Volume from AWS Console.


  • Go to Volumes from your EC2 Dashboard and click on "Create Volume"
  • Select the Volume Type as (General Purpose SSD - GP2) , Size as 10 GB, Availability Zone, and leave rest of options as default.
  • Click on Create Volume.


 2. You will get a confirmation that your volume has been created successfully and it will show the volume Id in the next screen.
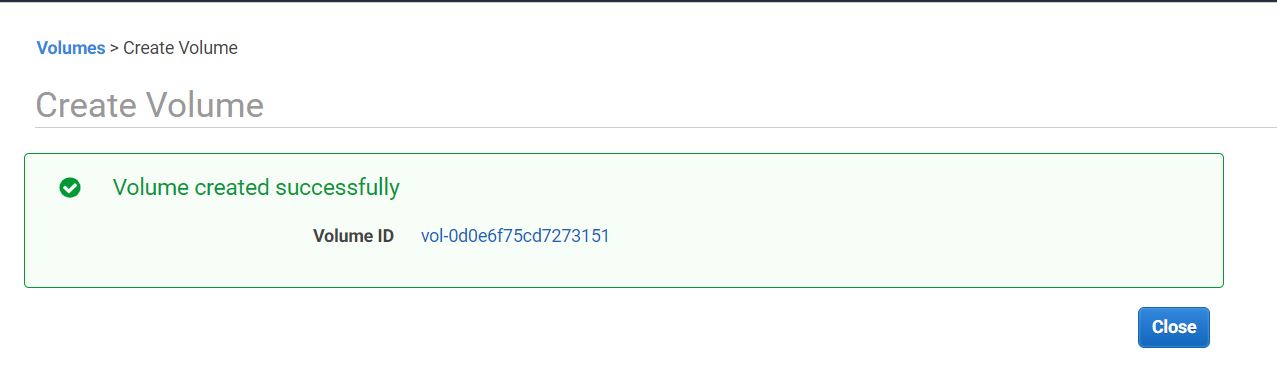

   3. Now click on Close , it will take you to the Volumes console where you will find an additional disk with "Available" status.


4. You have successfully created a new Volume of 10 GB size, now its time attaching this disk to your EC2 instance. To attache this new volume as a disk to your EC2 instance, select that new volume and click on "Action" and select "Attache Volume" option.

5. It will take you to the next screen where you will put the instance ID from the drop down menu and the Partition name of the disk will be automatically selected (as /dev/sdf) .. it is default path selected for the new volume by AWS.


6. Click on Attach button, and AWS will confirm that you have successfully attached the new volume to an instance. In the next window you will see that both volumes' status is now "in-use".


Commands for Mounting the New Volume in the EC2 Instance:


7. Since this EC2 instance is a linux instance , we will have to mount it as new partition / disk from the linux OS.

8. Log on to your EC2 instance, to which this new volume has been attached from AWS console.


9. type sudo su to take root access of the OS.

10. Now put the following command to list the available disks on your Linux EC2 instance.

    lsblk

It will list all disks available to the OS. In our example we can see that the last disk with them xvdf is visible (with 10G capacity).


We have to mount this disk to OS to use as data1 disk.

11.  Now check if this new disk contains any data or not. Run the following command to know this:

   #file -s /dev/xvdf

if the output of this command is /dev/xvdf:data then it means that this disk is empty.


12. Now format this disk / volume to use the file system ext4 with following command.

# mkfs -t ext4 /dev/xvdf

if you have shoot the command properly and there is no other error, it should give following results.


13.  Create a directory of your choice to mount our new ext4 volume. I am using the name “data1

 mkdir /data1

14. Now mount the new volume to "data1" directory through following mount command

# mount /dev/xvdf  /data1/


15. Now your new volume has been successfully mounted and is ready to use. you can confirm its usability using df -H command. It should produce following results:


This output confirms that your disk / volume has been successfully attached and mounted to your Linux OS for use.

Make the EBS Volume Mount permanent on Linux.


The Volume which we just mounted in previous steps is temporary. As soon as your OS will restart, this mount point will be lost and you will no longer be able to use this disk using /data1 path. To make it permanently available for use even after reboot, you will need to make changes in /etc/fstab file.

16. Take the back of fstab file using following command before making any changes.

# cp /etc/fstab /etc/fstab.old


17. Now make the following entry in /etc/fstab file using #vi /etc/fstab command

      /dev/xvdf      /data1        ext4       defaults,nofail

Save the fstab file using :wq! and exit the vi editor.


18. Now run the following command to check if the fstab file has any errors after you made this entry.

# mount -a

If your fstab file does not have any error the command will run seem less and you are done with 

19. Now reboot your EC2 instance, and it will mount the new volume automatically. you can check that with df -f command.


Hope This Helps !!!!

Thursday, April 25, 2019

Deploying Self Signed SSL certificate on AWS Application Load Balancer

Problem: When we create ALB (Application Load Balancer) under AWS ELB, we sometimes have to configure SSL on that load balancer to allow only HTTPs requests through it.


Assumption: 

I am assuming that audience of this blog post already know how to Spin up EC2 instances and how to create ELB - ALB in AWS.


Pre-Requisites: 

1. Two identical EC2 instances with Apache, OpenSSL and AWS CLI installed on them.
2. An IAM user having Power User access to the AWS subscription which will be used to upload certificates to IAM store.
3. An ALB (Application Load Balancer) in AWS with above 2 EC2 instances added in target group of this ALB and with only HTTP listener port. We will add HTTPS listener in later steps.


Solution: 

To solve the above problem we will take following steps.

1. Create 2 identical EC2 instances in 2 different Availability Zones with in the same region and allow them to be placed in public subnet of that VPC.
2. Log on to these instances using putty. In case of Windows instances connect them using RDP.
3. Since I am using Linux instances.. I will do putty to them. I have used Amazon Linux AMI to create instances since this AMI comes with AWS CLI & OpenSSL pre installed.
4. Get sudo access to the EC2 instance and then Install latest updates on these EC2 instances using following command.

  • Sudo Su
  • yum update -y
  • shutdown -r
5. Once the server resumes from restart, install Apache http server using following command: 
  • yum install httpd -y
This command will install Apache HTTP server on EC2 instance.

6. Now confirm if the Apache Service is active on the server or not, using following command.
  • systemctl httpd status
7. Now create an index.html file under /var/www/html directory in order to differentiate both the EC2 instances from each other. Run following command to create and update the index.html file 

  • cat > /var/www/html/index.html
        Put some code in the file like "I am Webserver1"
        Press Ctrl+C to save and close the file.


8. Run ls command to confirm that index.html file is present under /var/www/html folder.

9. Repeat steps 4 through 8 on second EC2 instance. Make sure you change the html code in index.html file on other EC2 instance like " I am Webserver2".

10. Now since we  have created 2 apache web servers on EC2 instances. Let us now create Self Signed Certificate which will be used on ALB later on.

11. To create Self Signed Certificate on your EC2 instance, you must have OpenSSL installed on it. the Amazon Linux AMI has OpenSSL preinstalled but if you are using any other Image or template then you can install it using following command.
  • yum install openssl -y
12. Once OpenSSL gets installed on the EC2, it automatically sets the environment variable so you can directly run the OpenSSL command.

13. To install the Self Signed SSL certificate you must have 2 files in PEM format (privatekey.pem and certificate.pem). We will create both of these files now using OpenSSL

14. On you EC2 instance one. run following commands to create the Private key and then the Certificate using that private key.

  •  openssl genrsa 2048 > my-private-key.pem
It will give you following output


15. Now create the certificate.pem file (Actual certificate) through following OpenSSL command.

  •  openssl req -new -x509 -nodes -sha256 -days 365 -key my-private-key.pem -outform PEM -out my-certificate.pem
Enter the details like Country name, Location, State, etc.
Make sure that you put the common name as : *.amazonaws.com because we will be using the SSL on ALB endpoint which ends with amazonaws.com

you will get following output.


16. Since we  have now successfully creates the SSL private key and SSL certificate on one server.. It is time to upload this certificate to your IAM store from where the ELB fetch it for allowing HTTPs traffic.

17. For uploading these 2 certificate files from your EC2 instance to your AWS IAM certificate store we will use AWS CLI. I am assuming that you have AWS CLI pre installed on your EC2 instance.

18. Run following command to configure your AWS CLI to connect to your AWS subscription.

  • AWS Configure
  • Enter the Access Key ID of the user you have created in IAM
  • Enter the AWS Secret Access Key for the same user.
  • Enter the default region name as "Region name where your ELB is running"
  • just press enter once and your AWS CLI is now configured on your EC2.
18. Upload both SSL files to your IAM store using following command
  •  aws iam upload-server-certificate --server-certificate-name MyCertificate --certificate-body file://my-certificate.pem --private-key file://my-private-key.pem
You will see following output in JSON format confirming that your SSL certificate files have been successfully uploaded to IAM store.


19. We are now good to configure our ALB (Application Load Balancer) to allow HTTPS traffic and use our Self Signed Certificate which we have recently uploaded too IAM.

20. Go to EC2 dashboard and click on Load Balancer from Left hand menu.
21. Select "Create Load Balancer"
22. Select "Application Load Balancer (ALB).
23. In the next window Give name to your Application Load Balancer and Select HTTP & HTTPS as listeners (This is very crucial). If you will select only HTTP , it wouldn't use the SSL certificate you uploaded. You will have to choose HTTPS also as the listener .


24. In Next Section, Select atleast 2 Availability Zones . Make sure you select those Availability Zones where are your EC2 instances are hosted.


25. In the Security Settings Page Select "Chose A Certificate From IAM" option and then Select "MyCertificate" from drop down. In the Security Policy section select the latest one to be compliant with latest security policies.


26. For Security Group Settings, Select the Security Group which allows HTTP & HTTPs traffic to this ELB from internet because this ELB is public facint. I have selected the same which my EC2 instances are using.


27. In the Next page "Configure Routing" , create a new Target Group and and add both of your EC2 instances as Targets. Here Target means the EC2 instances where the ELB will forward the request. Keep all the settings as default and click "Register Target" in the next window.

28. Click Review and then Launc.

29. It might take 2 to 3 minutes to create the ALB for the first time. Once your ELB is successfully created it will show you as "Active" when you will click on it.

30. It will show you a DNS name which is the end point of this ALB. We will use this endpoing in our browser to access the ALB.


31. Browse this DNS name (ELB End Point) in your browser. Based on the load balancing algorithm it will pass your request to one of the EC2 instances hosted behind this ELB.

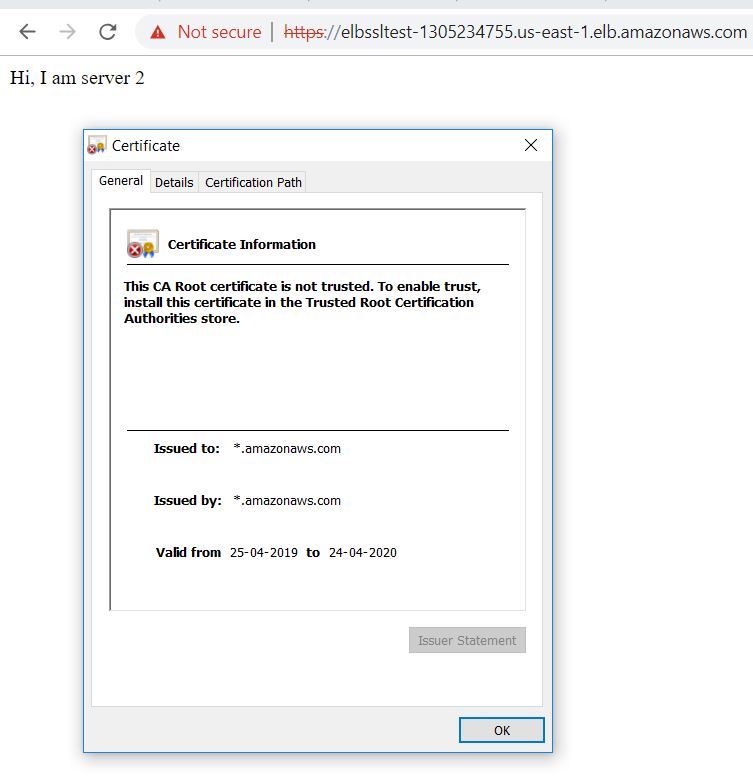
32. Let us try to access this ELB url with https:// , if our configurations are correct, it will show an error saying that "your SSL certificate is not trusted". This is the expected behavior because our SSL certificate is a self-signed certificate. It has not been issued by any Trusted Root CA.


34. This is how we can create the ALB (Application Load Balancer) in AWS which will allow HTTPS traffic using SSL certificate.


Enjoy!!!!

Monday, June 11, 2018

Installing and Configuring Apache HTTP server on an EC2 Linux instance in AWS

Hello Friends,

In this post, I will elaborate:

How to Install & Configure Apache HTTP server on an EC2 Linux instance in AWS


Prerequisite:


1. An AWS Subsription
2. An EC2 Linux instance (I have taken RHEL for my comfort)
3. A client machine
4. An SFTP client to upload custom HTML files


Steps : 


Creating Security Groups for EC2 instance to allow HTTP & SSH (SFTP) traffic.


  • I am assuming that you have already created a EC2  Linux instance in your AWS subscription and it is in running status. I have chosen RHEL Linux as I am more comfortable with this flavor.
  • Go to your EC2 Dashboard and Select "Security Groups" under "Network & Security" Section.
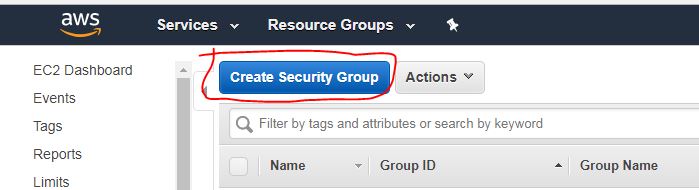
  • Click on "Create Security Group" 

  • On the Next Screen , give security group a name, description and set "Inbound" rule to allow HTTP traffic from Anywhere and  OutBound rule for all ports, then click "Create"
  • This will allow HTTP traffic from public to EC2 instances associated with this security group.
  • You don't need to create a Security Group for SSH(SFTP) because at the time of creation of EC2 instance , you must have selected the default Security Group which allows SSH from all sources.
  • Now associate our EC2 instance with this new security group.
  • Go to EC2 Dashboard and select your EC2 instance, Click on Actions , select Networking and then select "Change Security Groups"

  • On the next screen Select the Security Group (HTTP & HTTPs) which you had created in last step (keep rest of the settings unchanged) and then click on "Assign Security Group"
  • Now your EC2 instance has been assigned with the necessary Security Groups required for allowing HTTP & SSH connection. 
  • Now we will connect to to our Linux instance.


Connecting an EC2 instance through Putty.

  • At the time of creation of your EC2 Linux instance, you must have created and downloaded the Key-Pair(.pem file).
  • This Key-Pair will be used to connect to that EC2 instance through Putty.
  • But before we could use that key-pair to connect the EC2 instance , we will have to convert it in the format which is understandable by Putty. 
  • Putty does not understand .pem format so we will convert it to .ppk (Putty Private Key) file using Puttygen tool
  • Puttygen.exe can be downloaded from This Link.
  • Now open the Puttygen.exe file on your local machine and click on File and then select "Load Private Key".

  • Browse to the location where you have saved the key-pair (.pem file) and click Open


  • It will load the Thumbprint of Private Key in PuttyGen Console.Now click on Save Private Key button.

  • Save the Private Key in PPK format now.

  • Since we now have converted the key-pair in Putty usable PPK format, we will use it in Putty as authentication to connect our Linux EC2 instance.
  • Now open Putty and in Session window enter following address in Host Name (Or IP Address field) 
       ec2-user@ec2-18-205-163-151.compute-1.amazonaws.com

  • Here ec2-user is the default user name for the Linux EC2 instance (for RHEL instances) and ec2-18-205-163-151.compute-1.amazonaws.com is the public DNS name of your EC2 instance. This can be found on the EC2 instance properties. 
  • Now on your Putty window , Click on the "+" sign before SSH and then click "Auth" for setting up Putty to use Private Key as authentication , click on browse and navigate to the location where you had saved the .PPK file created in PuttyGen.

  • Now Select the PPK (Private Key) file and click Open. It will load the key-pair file in to Putty.

  • Now click Open 

  • You will now see the Putty session has been established with your EC2 Linux instance with the default user (ec2-user). 
  • It will also show the IP of the host from where you have connected this EC2 instance from. (I have hidden my public IP for security purpose)


Installing Apache HTTP server on your EC2 Linux Instance 

  • Once you get the Putty session of your EC2 Linux instance, rest of the things are very straight forward.
  • Get in to Sudo (root) access by typing following command
           sudo su

  • Because these EC2 instance have internet access by default , we will directly install the Apache HTTP server from Yum repository 
  • Shoot following command on your Putty session:
         yum -y install httpd 
  • httpd is the package name of Apache HTTP server. The above command will install Apache on your EC2 instance.
  • Now permanently enable httpd service through following command 
         systemctl enable httpd


  • Once httpd service is enabled you need to start the httpd service through following command:
      systemctl start httpd

  • You have now taken all the steps to Install , Configure and enable Apache HTTP server on your EC2 Linux install. Now its time to connect

Testing:

  • To test that Apache HTTP server has been successfully installed on your EC2 Linux machine and is able to process HTTP request, try to browse the Public DNS name of your EC2 instance from your local machines browser.
  • If your browser shows the Apache Test pages (as following) then you have successfully configured the Apache HTTP server on your EC2 instance.


Happy Blogging !!!!!


Sunday, June 10, 2018

Installing and Configuring Apache HTTP server on Linux (RHEL)

Hello There,

In today's post I will show:


How to install and configure Apache HTTP server on Linux server


Prerequisite:

1. A linux server an version (I have taken RHEL for my confort)
2. Root (Sudo) access on the Linux machine to install Apache
3. Internet connection on Linux box to connect and download repositories (Apache)
4. A client machine to test the website and connectivity to Apache Web server.

Steps:


  • Log on to your Linux machine and get sudo access


  • Now install Apache HTTP server Linux using Yum command
  • Execute following command on your Linux terminal 
        yum -y install httpd
  • This command will search for binaries on the online yum repositories and will install the dependencies before installing Apahce HTTP service (httpd)


  • Once all dependencies and packages required for installing apache http server are installed, the screen will look like following : 

  • Once Apache HTTP server is installed on your Linux machine you need to enable the httpd service because by default all external services are disabled in Linux. Execute following command to enable httpd service
      systemctl enable httpd


  • Now start the httpd service by following command: 
     systemctl start httpd


  • Now you need to add a firewall rule in your Linux IPTables to allow HTTP traffic on Port 80. Otherwise clients will not be able to access the websites running on your Apache webserver.
  • Shoot following command to enable HTTP access on port 80 on your Linux machine.
       firewall-cmd --zone=public --add-port=80/tcp --permanent

  • Once you successfully add the firewall rule on your Linux machine, you will need to reload your firewall services to make this change in to effect:
  • Shoot following command to reload your your firewall service on Linux instance:
      firewall-cmd --reload

  • Now check if your Firewall has really allowed port 80 and if the Rule has been added to IPTables or not This command is just to double check that your firewall is allowing port 80 (http), if port 80 is allowed then you should get result as shown in following screenshot:
       iptables-save | grep 80


  • And that's it, You have taken all the necessary steps to Install & Configure Apache HTTP server on a Linux box.

Testing :

  • To test that Apache is now configured on Linux box and can serve the HTTP requests successfully, try to access your Linux server's IP from browser of client machine (In my case it is a windows XP Virtual Machine) like http://192.168.75.136
  • You should get the Apache Test page on client machine's browser.


Voila!!!!! Apache HTTP server is not successfully set up on your Linux machine

Happy Blogging !!!!